Tuesday, October 11, 2011
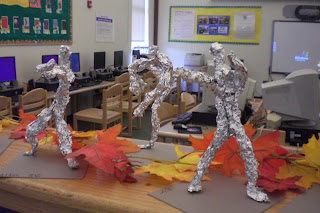
Giocometti Foil Sculptures
Fifth grade students observed the artwork of Alberto Giocometti and created sculptures with similar characteristics (elongated torso and limbs). The students' sculptures are based on gesture drawings drawn the previous week. This quick method of drawing is meant to capture the action of the person. Once the student created their sculpture it was glued to a base. The fifth grade artists had a great time making their sculptures....so much so that we will be creating a life size sculpture through the winter!
The idea for these sculptures was taken from a similar lesson on Mrs. Knight's Smartest Artists blog.
Subscribe to:
Post Comments (Atom)


thanks for the mention! so i have a question - did you use the same template... just stretched out? or did you assemble them in a different way? would love to know your technique for the elongation!
ReplyDelete@ Hope... I pre-cut the foil to 15 (or 16) inches and your template worked great! Once the sculpture was finished I hot glued them to a matboard base.
ReplyDeleteA question: I've done some stuff w/foil before, but it seems like when you work it a lot it gets brittle and doesn't hold together well. How do you prevent this?
ReplyDeleteHi Phyl: I used heavy duty foil and the guide that Hope posted on her blog, Mrs. Knight's Smartest Artists. I put my own spin on her idea and lengthened the foil to 16-17 inches so the sculptures would turn out more Giocometti-like. After the students drew the guide lines and cut the foil I had them gently sguish the foil to start forming the body parts. From there they could squeeze the foil and start creating a pose.
ReplyDeleteFantastic art work.. I absolutely love these sculptures. This activity would also work with Keith Haring figures. If you don't mind I'm thinking of doing this with my year 5 students... thanks for the idea. Anna
ReplyDelete